Affiliate disclosure: This post contains affiliate links. If you buy through them, we may earn a small commission at no extra cost to you.
Here's a quiet truth about crowded closets: at any given moment, roughly half of what's hanging there is wrong for the weather outside. Puffer coats shoulder-to-shoulder with sundresses, wool sweaters compressing the linen shirts — all of it fighting for the same rod. The fix isn't a bigger closet. It's a seasonal swap: twice a year, off-season clothes move into storage and your closet instantly doubles. Here's how to do it so everything comes back fresh, uncrushed and moth-free.
Step 1: Swap on the calendar, not the crisis
Pick two weekends a year — one in spring, one in fall — and treat them as standing appointments. Swapping on a planned Saturday takes ninety minutes; swapping during the first cold snap, while late for work, takes weeks of half-measures. Put it in your phone now: the system starts with the date.
Step 2: Purge on the way out, not the way in
The moment you take off-season clothes out of rotation is the single best decluttering opportunity of the year, because the season just told you the truth. That sweater you didn't wear once all winter? You have the full data. Ask three quick questions per item: Did I wear it this season? Does it still fit? Would I buy it again today? Two noes and it goes in the donate bag. Purging now means you store — and later unpack — only clothes you actually wear.
Step 3: Wash everything before it goes in
Every single item gets washed or dry-cleaned before storage, even the "barely worn" pieces. Invisible body oils and food traces are exactly what attract moths and set permanent yellow stains during months in a bin. Skip fabric softener on storage loads, make sure everything is bone-dry, and never store anything in the plastic from the dry cleaner — it traps humidity against the fabric.
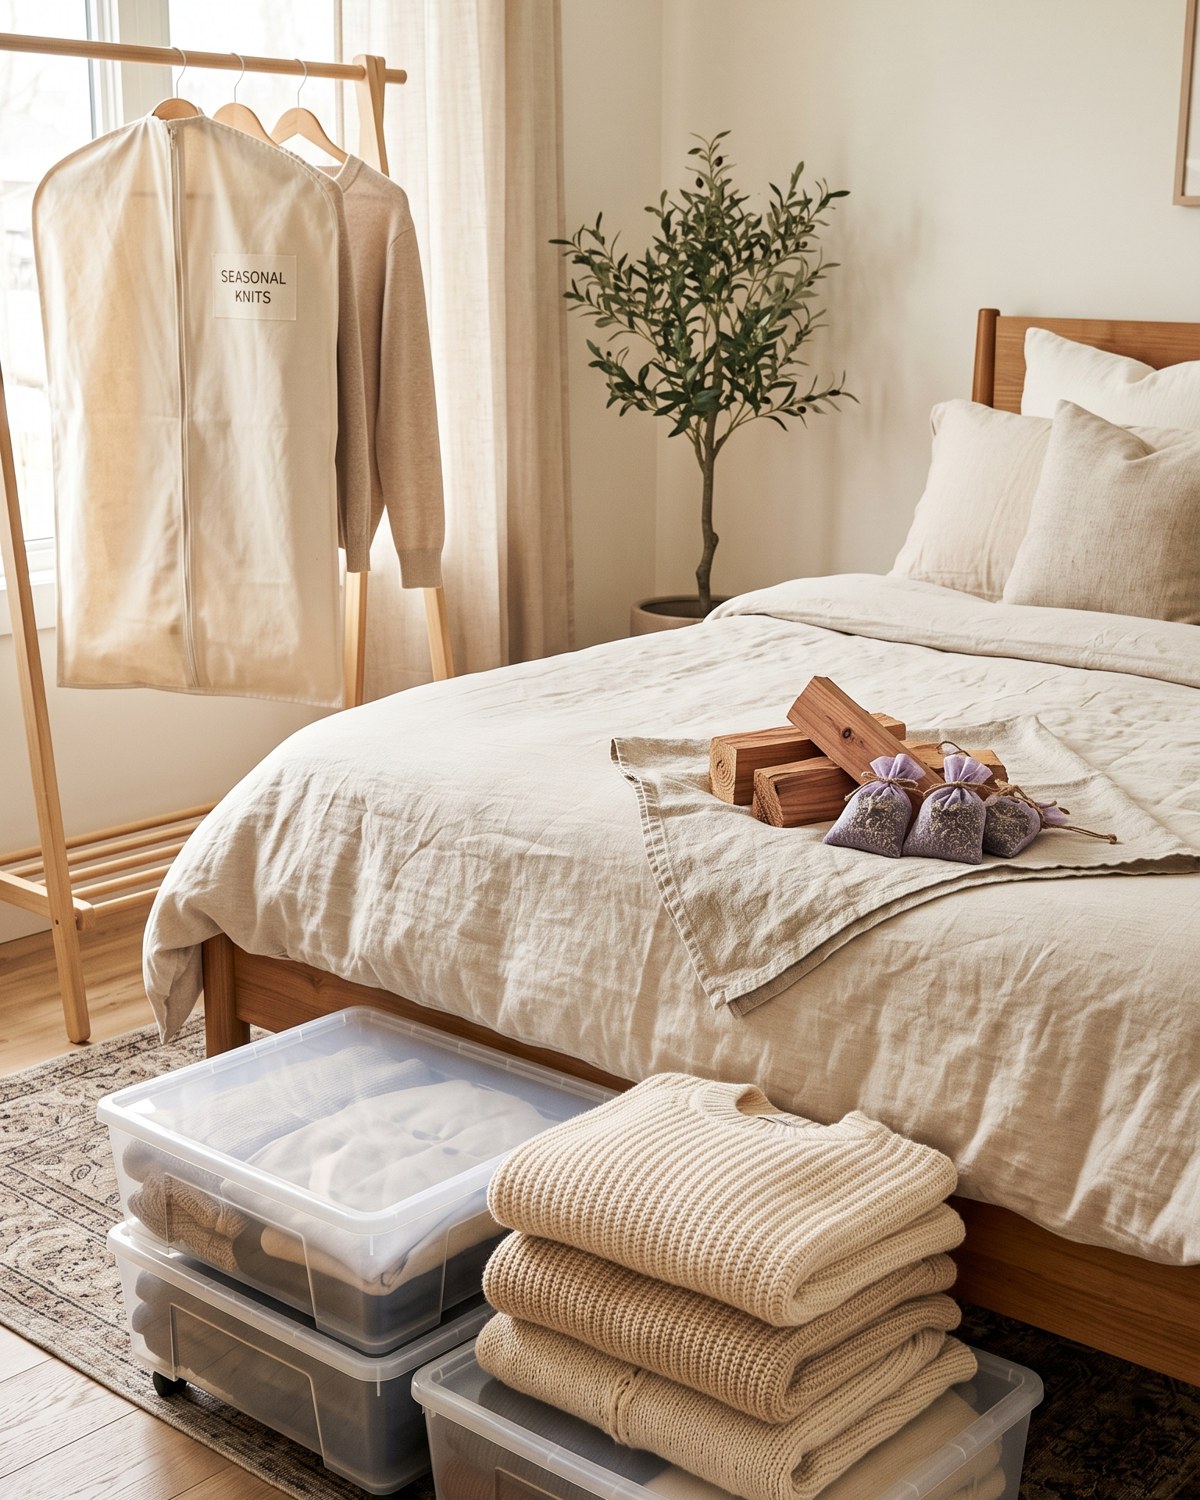
Step 4: Choose the right container for each fabric
One rule sorts everything: squash the sturdy, protect the delicate.
Sweaters, jeans, tees and puffers handle compression beautifully — vacuum storage bags shrink a mountain of knitwear to a quarter of its size. Shop on Amazon → Slide the flattened bags into under-bed storage containers with wheels and reclaim the most underused real estate in the house. Shop on Amazon → For everything else, clear latching bins let you see contents without opening a single lid. Shop on Amazon →
Delicates play by different rules. Wool coats, blazers and dresses keep their shape in a hanging garment bag with a breathable fabric back. Shop on Amazon → Anything structured that folds — think special-occasion pieces — goes loosely folded with acid-free tissue, never vacuum-sealed.
Add cedar blocks or lavender sachets to every container; both deter moths without the mothball smell your grandmother's attic never recovered from. Shop on Amazon →
Step 5: Label like a stranger will unpack it
Tape a card to each bin listing the season and actual contents — "WINTER: wool sweaters, scarves, flannel sheets" beats a vague "old clothes" label every time. A label maker keeps it crisp, but a marker works fine. Shop on Amazon → Then store bins by climate, not just by space: skip damp basements and hot attics for anything you love. Under the bed, a closet top shelf, or a dry garage shelf are the safe zones.
The payoff: opening a closet that fits the season
Done right, the swap ends with a closet where everything hanging is wearable today — no pushing past parkas in July. And six months from now, unpacking feels oddly like a shopping trip: a bin full of clothes you forgot you loved, clean and ready to wear.
Ninety minutes, twice a year. It's the best rent you'll never pay for a second closet.